
Building an application with GitHub Actions
In the first guide in the essentials of automation module, we introduced you to GitHub Actions by building a simple "Hello World" workflow and explaining the individual components of a workflow file. This guide takes those learnings in a practical direction to build a Next.js application that we will test and deploy in the following guides. By the end of this module, we’ll have built, tested, and deployed a simple web application to GitHub Pages using GitHub Actions. Amplifon joins us again to tell us about how they’ve accelerated their deployment practices by leveraging GitHub Marketplace and embracing innersourcing.
In this guide, you will learn:
The basics of building an application in Actions
How and why to use existing actions from GitHub Marketplace when possible
Best practices for safely using third-party actions from GitHub Marketplace
Create your CI/CD workflow file
Our first step is to create the workflow file that will take us through the process of building, testing, and deploying our web application to GitHub Pages. If you started with the first guide in this module and copied the demo repository, then you’re ready to go. If not, we recommend returning to that guide and following the instructions for “How to follow along with our demo repository” first.
With that, let’s get started.
Navigate to your copy of the
actions-learning-pathwayrepository on GitHub.com in your browser.Navigate to the “Actions” tab of your repository and click New workflow.
Click Set up a workflow for yourself to begin editing a blank workflow file in the
.github/workflowsdirectory of your repository. Set the file name tobuild-test-deploy.yml.Enter the following code into the editor:
name: hello-world
on: push
jobs:
  hello-world-job:
    runs-on: ubuntu-latest
    steps:
      - name: Check out repository code
        uses: actions/checkout@v3
      - run: echo "$(cat hello_world.txt)"
The first part of this workflow looks a lot like our first one. It still runs on: push and uses a GitHub-hosted runner on ubuntu-latest. The first step also stays the same: checking out the code using the checkout action, which retrieves the repository's code and allows our workflow to access the contents of our repository.
Configure your build tool
Since we're using Node.js, we need to set it up using the setup-node action. To do this, we’ll add a step similar to the previous one. Since we want to use a specific version of Node.js, however, we’ll look at the usage instructions for this action and set the version accordingly.
      - name: use node.js
        uses: actions/setup-node@v3
        with:
          node-version: '18.x'
The setup-node action, like the checkout action, is one of the tens of thousands of actions available on GitHub Marketplace for you to use. It’s always best to search to see what’s available on GitHub Marketplace before building your own. Remember, however, to audit the code of any third-party actions you use. One simple way to make sure you’re running code you can trust is to look for the “Creator verified by GitHub” message next to the action in the search results.

This message indicates that the action has been created by a trusted company like GitHub, Microsoft, or Amazon Web Services, for example. Another best practice is to lock the action on the Git SHA so that you know the action’s code won't change. This will also help ensure that any updates or changes to an action don’t break your workflows.
We use actions from GitHub Marketplace whenever possible to solve common problems. There’s no need to reinvent the wheel, and this saves us time and helps keep our workflows clean and simple.
When we do write our own actions, we share them internally so that everyone at Amplifon can reuse them and benefit. It’s a simple way to foster an innersource culture and eliminate duplicate work.
Build your code
With our build tool installed and configured, we’ll build our Next.js application with npm. To do so, you can use the same commands that you would use locally to build your code, so we’ll add the following, also under steps, to install npm and then run its build command:
      - run: npm install
      - run: npm run build
Here’s how your build-test-deploy workflow should look at this point:
name: build-test-deploy
on: push
jobs:
  build:
    runs-on: ubuntu-latest
    steps:
      - name: checkout repo
        uses: actions/checkout@v3
      - name: use node.js
        uses: actions/setup-node@v3
        with:
          node-version: '18.x'
      - run: npm install
      - run: npm run build
Since our workflow runs on: push, any push to your repository (including this file itself) will trigger the workflow, so once you've made these additions, let’s commit our changes and build our application.
Click Commit changes….
Enter a commit message and click Commit changes in the dialog box.
This returns you to the .github/workflows directory of your repository, where you can see your newly created build-test-deploy.yml workflow file. Let’s go see if it worked!
Select the “Actions” tab.
Click the commit message you just entered—or Create build-test-deploy.yml if you left it blank—to see the details of the workflow run.
Click the build job to expand the individual steps.
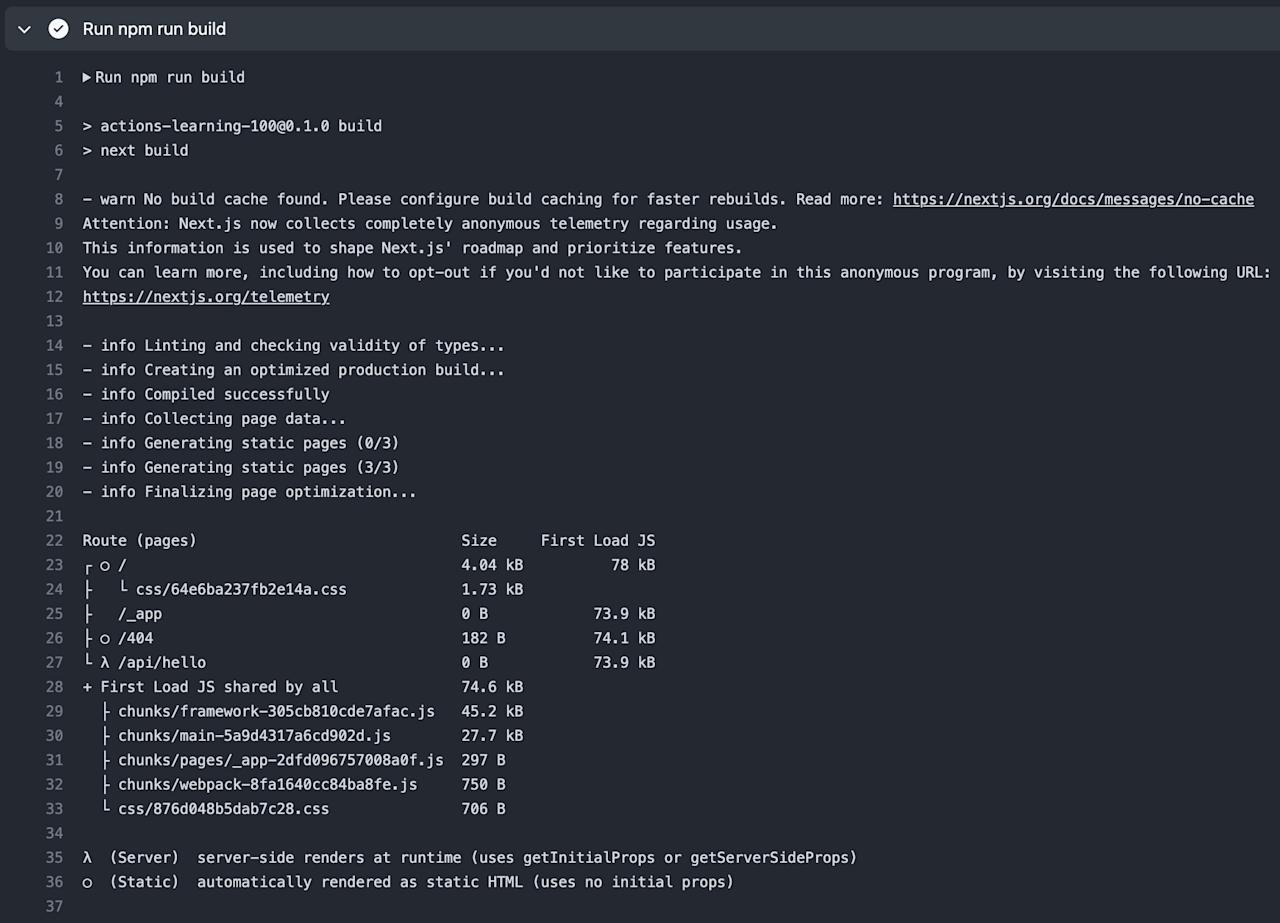
Click run: npm run build to see the details of the build.
Up next: Testing applications with GitHub Actions
Now that we’ve built our application, we need to confirm that it came out the way we expected. Actions makes it possible to automate a whole range of different tests, so that you never need to worry about running them manually. In the next guide, we’ll expand our workflow by adding a simple test.