
Testing applications with GitHub Actions
Now that we’ve built a simple web application using GitHub Actions, we’ll move on to the next step of our CI/CD pipeline: testing.
We know that running tests manually can be a pain. With Actions, you can remove that pain through automation. You can enforce which tests run when, where, and in what circumstances via centralized workflows in Actions, rather than piecemeal scripts in disparate environments. In this guide, we’ll show you the basics of testing with Actions, and we’ll hear from Amplifon again on how they used a third-party action for testing and used self-hosted runners to deal with custom hardware requirements.
In this guide, you will learn:
How to test your code with GitHub Actions
How GitHub Marketplace provides actions for a multitude of tests
How to decide between GitHub-hosted and self-hosted runners
Testing our build
In the last guide, we created the build-test-deploy.yml workflow in the actions-learning-pathway repository and built our sample Next.js web application. Now, we want to test that build to make sure everything came out as planned. For this, we’ll run a simple unit test, but know that Actions can run nearly any type of test. For example, Amplifon uses an action from GitHub Marketplace to easily integrate with third-party testing software.
GitHub Marketplace offers pre-built actions in various languages for every type of testing you could need. For example, we ensure code quality with the PMD action, which runs the PMD code quality analyzer on our Java, JavaScript, and Apex code. This standalone action handles all the necessary steps to run PMD on our GitHub repositories.
Let’s see where we left off.
Open your copy of the
actions-learning-pathwayrepository in your browser.Open the .
github/workflowsdirectory, and then openbuild-test-deploy.yml.
Your workflow file should look like this to start:
name: build-test-deploy
on: push
jobs:
  build:
    runs-on: ubuntu-latest
    steps:
      - name: checkout repo
        uses: actions/checkout@v3
      - name: use node.js
        uses: actions/setup-node@v3
        with:
          node-version: '18.x'
      - run: npm install
      - run: npm run build
Now, let’s add a test job directly following the build job to ensure that we test every time we build by adding the following code to the bottom of the file. Since we’re building every time we push, we’ll now also test every time we push, too.
  test:
    needs: build
    runs-on: ubuntu-latest
    steps:
      - name: checkout repo
        uses: actions/checkout@v3
      - name: use node.js
        uses: actions/setup-node@v3
        with:
          node-version: '18.x'
      - run: npm install
      - run: npm test
Most of this should look familiar, as it’s almost identical to the build job above it. We named our job test, designated a GitHub-hosted runner to use ubuntu-latest, and used the same pre-built actions to checkout our code and then install npm. You might wonder why we need to do all this again. It's because jobs are completely independent, so steps are scoped locally and need to be repeated for every job. While this may seem like a hassle, it also means that you can make different decisions for each job, such as choosing a different runner, or a different version of any component, according to your needs.
There are many ways to automate tests, but using Actions allows us to fully integrate our tests with GitHub events, which has enabled us to create some elaborate CI/CD strategies. Plus, including tests in our Actions workflows means we’re keeping everything related to the development lifecycle in one place. It makes life simpler. We don’t have to keep track of multiple applications and configuration files to handle different stages of the CI/CD process.
While most of the test job is identical, you’ll notice a few differences as well. The first difference in the code you might notice is the second line of our code: needs: build.
This means that the test job needs the build job to successfully run. If the build job fails, then the test job will not run.
The needs keyword enforces jobs run in a sequential order, where the current job is contingent upon the success of another job. This comes up a lot when you think about CI/CD. You don't necessarily want to test your application if it can’t successfully build. The same goes for deployments. You don't want to deploy your application if it fails its tests.
The second difference you’ll notice is the final line: - run: npm test.
Just like in the build job, we set up Node.js and then installed it, but now, rather than running npm build, we’re going to run npm test to test our code, just as we would from the command line.
Choose between GitHub-hosted and self-hosted runners
As we touched on earlier, Actions provides two execution environments for your workflows: GitHub-hosted runners and self-hosted runners.
GitHub-hosted runners are recommended for a vast majority of scenarios. Each GitHub-hosted runner is a new virtual machine containing the runner application, other preinstalled tools, and either Ubuntu Linux, Windows, or macOS. With GitHub-hosted runners, machine maintenance and upgrades are taken care of for you, as is the operation of the runner.
Self-hosted runners, on the other hand, run on servers that you provision and maintain, but they offer a key feature as well: the ability to run workflows on custom hardware for testing.
Self-hosted runners offer more control of hardware, operating system, and software tools than GitHub-hosted runners provide. With self-hosted runners, you can create custom hardware configurations that meet your needs with processing power or memory to run larger jobs, install software available on your local network, and choose an operating system not offered by GitHub-hosted runners. Self-hosted runners can be physical, virtual, in a container, on-premises, or in a cloud.
Since our code is running on ubuntu-latest on a GitHub-hosted runner, we’ll stick with that for the test job as well.
We generally prefer GitHub-hosted runners because they’re powerful, convenient, and easy to use. We don’t have to run our own servers, and each GitHub-hosted runner is a completely clean, ephemeral instance, so you don't have to worry about side effects from previous jobs.
But self-hosted runners let us test our software on custom hardware, which is critical for us to have clean, performant, and bug-free code. We build mobile applications and software that runs in hearing aids, and we need to run integration and system verification tests to make sure it works directly on this hardware—not just in theory. Self-hosted runners let us do that.
Now that our build-test-deploy.yml workflow file contains the steps to both build and test, it should look like this:
name: build-test-deploy
on: push
jobs:
  build:
    runs-on: ubuntu-latest
    steps:
      - name: checkout repo
        uses: actions/checkout@v3
      - name: use node.js
        uses: actions/setup-node@v3
        with:
          node-version: '18.x'
      - run: npm install
      - run: npm run build
  test:
    needs: build
    runs-on: ubuntu-latest
    steps:
      - name: checkout repo
        uses: actions/checkout@v3
      - name: use node.js
        uses: actions/setup-node@v3
        with:
          node-version: '18.x'
      - run: npm install
      - run: npm test
With our test job added, let’s commit our changes and check out the results.
Click Commit changes….
Enter “add test” as the commit message and click Commit changes in the dialog box.
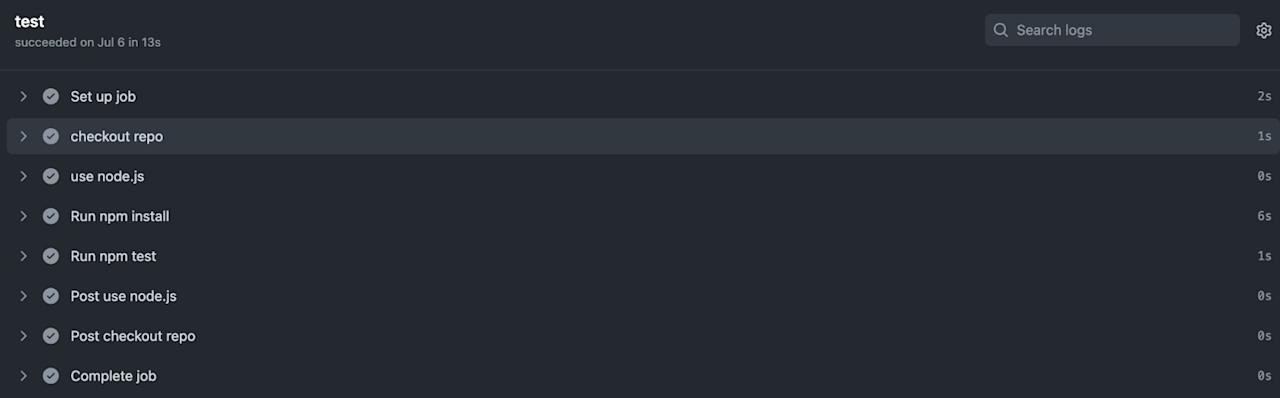
Select the “Actions” tab and click on the “add test” workflow run that lists the
build-test-deployworkflow below it to see the status of both thebuildandtestjobs.You’ll see that the
buildandtestjobs are visually linked together, implying that one needs the other.

Click on the test job here in our visual workflow to again explore the individual steps of the job.
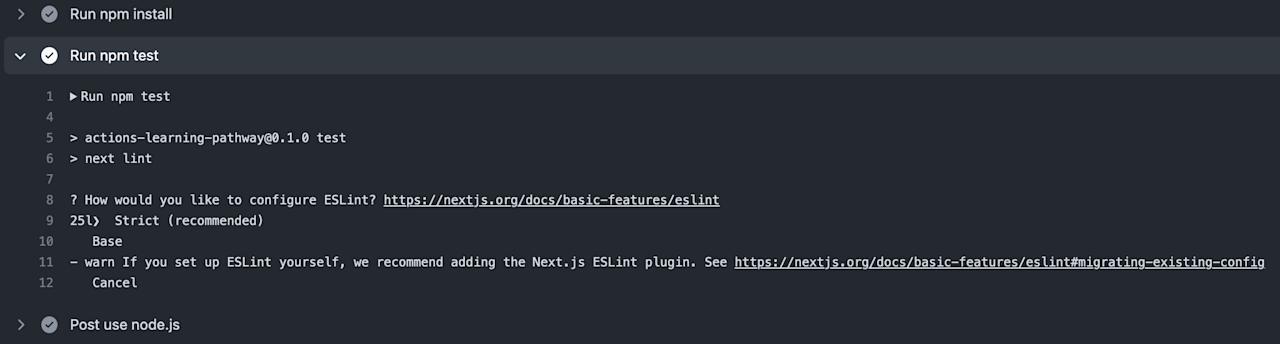
Click on the “Run npm test” step to see that the test step also performed some linting using ESLint.
It’s that easy to automate testing with GitHub Actions—just a few steps in a workflow file! Of course, there’s much more to testing than running a unit test in a singular environment. Stay tuned, and we’ll get into some more advanced testing automation strategies further along in the automation learning pathway.
Up next: Configure your deployment environment in GitHub
With our application built and tested, we’re nearly ready to deploy it. There’s just one step left before that: configuring our deployment environment.