
Building a workflow with GitHub Actions
In this guide, we will create your first GitHub Actions workflow, explaining the basic components and methods while we do. We’ll also set up the demo repository, which will serve you for the rest of this Essentials of GitHub Actions module. Along the way, we’ll hear insights and tips from Amplifon on how they used GitHub Actions for CI/CD and workflow automation to improve their development processes.
Let’s get started!
In this guide, you will learn:
How to create a GitHub Actions workflow file
How to trigger a workflow according to specific GitHub events
How to execute a reusable action in your workflow
How to execute a workflow using a GitHub-hosted runner
Follow along with our demo repository
If you want to follow along with the Automations learning pathway, you’ll need to create a copy of our demo repository, which contains an example web application that we’ll deploy to GitHub Pages using GitHub Actions. The demo repository also contains copies of all the files created during this module in the demo-files directory.
Open the actions-learning-pathway repository in a new tab.
Click Use this template above the file list and select Create a new repository.
Use the Owner dropdown menu to select the account you want to own the repository.
Name your repository
actions-learning-pathwayand add a simple description to make it easier to identify later.Set the default visibility for the repo to public, as private repositories use Actions minutes, while public repositories can use GitHub-hosted runners for free.
Click Create repository from template and we’re ready to build our first Actions workflow!
Create your first Actions workflow file
An Actions workflow is a configurable automated process made up of one or more jobs defined using YAML. Workflows follow a specific structure and are stored in the .github/workflows directory of your repository. There are two ways to create a new workflow—either by creating a new YAML file in the .github/workflows directory, or from the Actions tab of your repository. The first way is simple and straightforward, but the second has some advantages, so let’s do that for now:
Navigate to the “Actions” tab of your repository and click New workflow.
Take a look around and you’ll see that GitHub has suggested a variety of starter workflows based on the languages of the code in your repository. Since the actions-learning-pathway repository has JavaScript and Node.js files, suggestions are primarily for those languages.
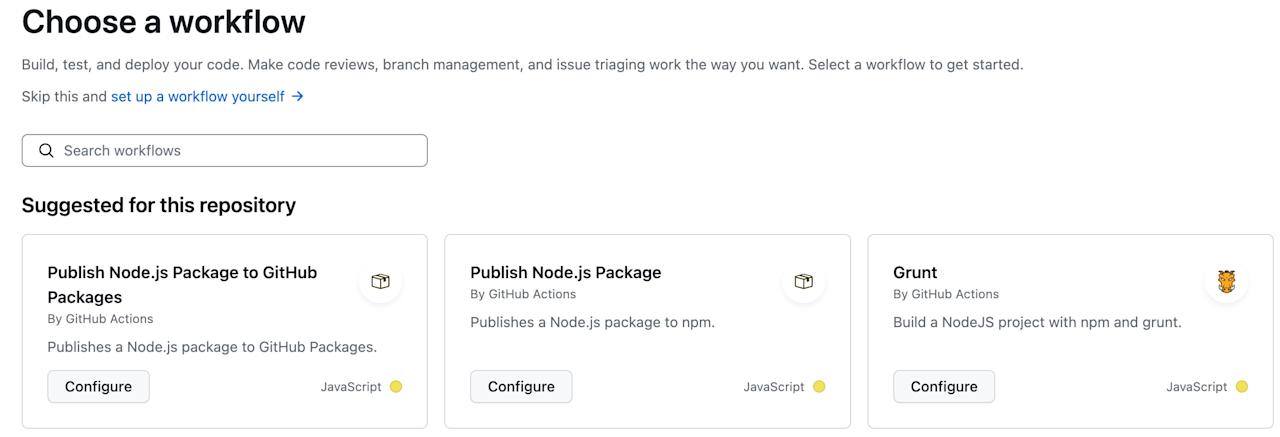
The page also lists workflows organized by categories, such as Deployment, Security, Continuous Integration, Automation, and Pages, and provides a search bar to help narrow recommendations. This page is a good place to look before building something from scratch.
But since we’re interested in learning about the basics of the workflow file, we’ll start from scratch:
Click Set up a workflow for yourself to begin editing a blank YAML file in the .github/workflows directory of your repository. Set the file name to hello-world.yml.
Now you’re ready to start building your first GitHub Actions workflow!
Actions has been transformational in helping us build our CI/CD pipeline. We had been wrestling with unpredictable deployments, duplicate code creation across working groups, and inefficient manual processes. Adopting workflow automation led to remarkable enhancements: expedited deployments, improved release management, and enhanced code reuse and knowledge sharing.
Now, we’re able to code, build, and distribute directly from the browser. Actions is a powerful yet flexible tool that expands our ability to innovate and scale.
Now that we have a file to edit and a place to do it, let’s build a workflow to automatically say “Hello World!” whenever someone pushes to our repository. We’ll write the file and explain the steps along the way. You can either write the code line by line, or copy the example at the end and follow along with the other steps.
Name your workflow
name: hello-worldGiving your workflow a descriptive name not only improves its readability, it also helps others to more easily understand your workflow’s purpose without investigating each component. In this case, we’re writing your typical “Hello world”, so we’ll name it hello-world.
Set the workflow’s trigger event
Every workflow file needs to have one or more events that trigger it to run. Events cover most any GitHub activity, from opening a pull request to commenting on an issue to the successful completion of another workflow. You can even trigger workflows from outside of GitHub via an API call and the repository-dispatch event. These events provide a simple means for a tight integration between your CI/CD pipelines and the platform powering your development, while still providing the flexibility to interact with your other tools.
For our hello-world example, we’ll keep it simple and set the workflow event to push.
name: hello-world
on: push
The push event runs your workflow when you push a commit or tag, or when you create a repository from a template. So when we finish writing hello-world.yml and commit it, the workflow will run. But first, we have to tell it what to do.
Define a job
Now we need to define what happens when the workflow runs by creating a job. Every workflow has one or more jobs, which consist of a series of interrelated, executable steps.
We’ll start the jobs: section of our workflow and name our job hello-world-job.
name: hello-world
on: push
jobs:
  hello-world-job:
By default, jobs function independently and run in parallel, but you can also configure a job to wait for another job(s) to complete before it begins. For instance, you could have separate build jobs for different architectures running concurrently, with a subsequent packaging job that only initiates once all build jobs have successfully concluded.
Specify a runner
A runner is a machine that executes the jobs in a workflow. There are two basic types of runners available: GitHub-hosted runners and self-hosted runners.
A self-hosted runner is a system that you deploy and manage on your own infrastructure to execute GitHub Actions jobs.
A GitHub-hosted runner provides a freshly-provisioned virtual machine running Ubuntu Linux, Microsoft Windows, or macOS. When selecting a GitHub-hosted runner, you can identify the specific OS version, or specify -latest to use the most recent, stable image available. GitHub also offers larger runner versions that have additional features, such as runner groups for access control across an organization and more.
We recommend using GitHub-hosted runners for the majority of situations (they eliminate overhead and make life easier), but we’ll see how self-hosted runners can be useful too in a later guide.
For now, we’ll use Ubuntu-latest on a GitHub-hosted runner:
name: hello-world
on: push
jobs:
  hello-world-job:
    runs-on: ubuntu-latest
If a self-hosted runner goes 14 days without executing a job, it stops (an ephemeral self-hosted runner is automatically removed from GitHub if it has not connected to Actions for more than one day). To counteract this, we've set events in most of our repos to initiate a job every 12 days or so. This routine maintenance task keeps our self-hosted runners up and running, ensuring we can rely on them when needed.
Add a step to run your first action
As we mentioned before, each job is made up of one or more steps. Each step can either run a script that you define or run an action, which is a reusable extension that can simplify your workflow. You can write your own custom actions, or you can use actions from GitHub Marketplace, which has thousands of actions for everything from code review to dependency management to security and more.
Third-party actions not only decrease code repetition, they also let you take advantage of the wider GitHub developer ecosystem. Why write custom integrations when they already exist?
Similar to how GitHub recommends starter workflows, you’ll also notice that GitHub recommends potentially useful actions directly from the editor on GitHub.com, making it simple to employ actions on the fly.
For our hello-world workflow, we’ll start with the Checkout action, which allows your workflow to access the contents of your repository, so that you can run scripts or other actions against it—such as running build and test tooling. You’ll want to use the checkout action any time your workflow will need to access the repository's contents.
name: hello-world
on: push
jobs:
  hello-world-job:
    runs-on: ubuntu-latest
    steps:
      - name: Check out repository code
        uses: actions/checkout@v3
First, we define a name for our step. This is optional, but it’s a good practice, because it will be recorded in the logs and can help you track down errors as your workflows become more complicated.
Next, uses: actions/checkout@v3 specifies that this step will use @v3 of the checkout action. Similar to any dependency, you should indicate the version of the action you'd like to use based on your comfort with automatically accepting updates to the action. You can find the latest version of an action by finding the action in GitHub Marketplace. If you don’t specify a version, the latest version will automatically be used, and could break your workflow when breaking changes are made to the action.
Say “Hello World”!
Finally, we’ll add a step to run a bash script that echoes our Hello World! phrase, which we’ve stored in a file in our actions-learning-pathway repository. The checkout action is doing its job here, giving our bash script access to the hello-world.txt file to echo its contents.
name: hello-world
on: push
jobs:
  hello-world-job:
    runs-on: ubuntu-latest
    steps:
      - name: Check out repository code
        uses: actions/checkout@v3
      - run: echo "$(cat hello_world.txt)"
With the final step added, we’ll save the workflow and see Actions, well, in action!
Click Commit changes…
Enter a commit message and click Commit changes in the dialog box.
This returns you to the .github/workflows directory of your repository, where you can see your newly created hello-world.yml workflow file. Since you just pushed the file to your repository, and your workflow is set to run on: push, let’s go see if it worked!
Select the “Actions” tab.
Click Say hello world! (the name we gave the final step) to see if we were successful.
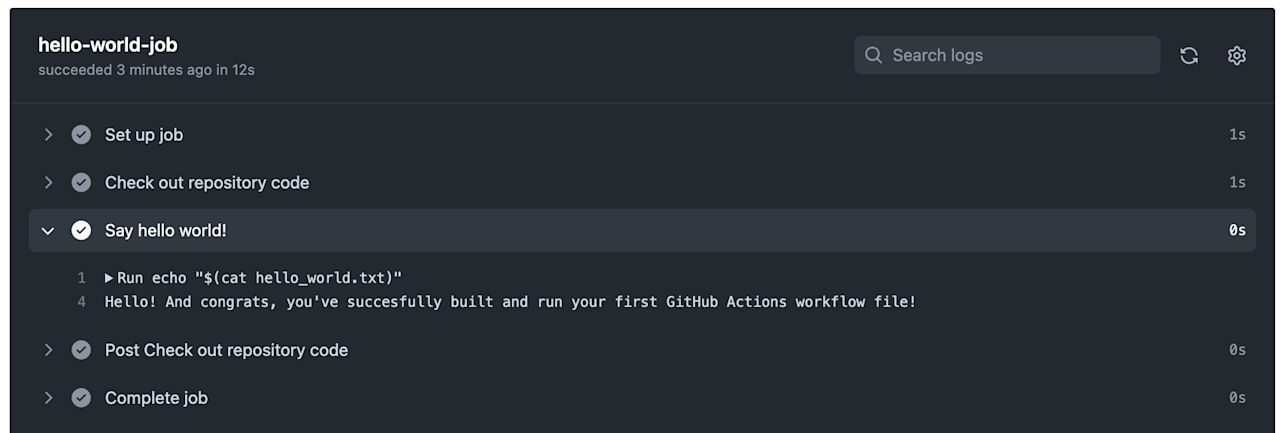
As long as we did everything correctly, we should see all of the jobs listed out on the screen, with the time it took to run each one listed alongside it. If you run into an error, look closely to see that your code matches the code shared above and remember that whitespace matters, and incorrectly-spaced YAML will produce errors.
With the Say hello world! step expanded, we can see that our workflow file ran echo $(cat hello_world.txt), which echoed “Hello! And congrats, you’ve successfully built and run your first GitHub Actions workflow file!” to the logs.
Success!
Up next: Building an application with GitHub Actions
Now that we’ve learned about the basic building blocks of GitHub Actions, let’s use them to do something a bit more interesting and useful than writing a “Hello world!” message to the logs—let’s write a simple CI/CD workflow to build, test, and deploy a web application to GitHub Pages using GitHub Actions. We’ll start off by building an application with GitHub Actions.